If you run a restaurant, manage a commercial kitchen, or own a rental property with a shared kitchen, you have probably wondered whether you can clean a grease trap yourself. DIY grease trap cleaning is possible for small under-sink traps, but there is a line where DIY stops making sense, and crossing that line can cost you a failed health inspection, a sewer backup, or a citation for illegal grease disposal. This guide walks through the full DIY process, the tools you need, the safety rules, and the compliance traps that catch owners who thought a shop vac and a strong stomach were enough.
We service grease traps and septic systems in Hesperia and the surrounding High Desert, so we have seen both sides of this. We have met owners who handle their own small traps just fine. Additionally, we have also pumped out kitchens where a DIY habit turned into a grease-packed line, a flooded floor drain, and a very bad week. The goal here is to help you figure out which situation you are in before the inspector or the backup decides for you.
Why Grease Traps Fail, and Why Inspectors Care So Much
Grease traps exist because fats, oils, and grease, what the industry calls FOG, do not stay liquid once they leave your fryer or dish sink. They cool, harden, and stick to pipe walls. According to the U.S. Environmental Protection Agency, grease from restaurants, homes, and industrial sources is the most common cause of reported sewer blockages, responsible for 47% of cases. That is why health departments and sewer districts treat grease traps as a compliance item, not a suggestion.
The scale of the problem is bigger than most owners realize. According to Wastewater Digest, a single restaurant can release between 800 and 17,000 pounds of grease into the sewer system each year. Your trap is the only thing standing between that grease and the public line, or in septic country like Hesperia, between that grease and your drain field.
A trap works by slowing wastewater down so grease floats to the top and food solids sink to the bottom. Cleaner water flows out the middle. The catch is that a trap only works when it has room. Once the grease layer and the solids layer together fill about a quarter of the tank, the trap starts passing grease downstream. That is the point where you are out of compliance in most jurisdictions, whether you knew it or not.
Can You Clean a Grease Trap Yourself? The Honest Answer
Yes, you can clean a grease trap yourself if it is a small, under-sink passive trap, usually a metal box holding somewhere in the range of 20 to 50 pounds of grease capacity. These are the traps you see under a three-compartment sink in a small kitchen. They are designed to be opened, scooped, and cleaned by hand on a regular schedule.
However, the answer flips for large in-ground grease interceptors, the concrete or fiberglass tanks buried outside the building that hold hundreds or thousands of gallons. Those require a pump truck, proper waste manifests, and disposal at a licensed facility. No amount of buckets and determination makes a DIY interceptor cleanout legal or practical. This distinction, grease trap vs grease interceptor, is the single most important thing to sort out before you touch anything.
Here is a quick way to tell which one you have:
- Indoor, under or near the sink, lid you can lift by hand: small passive trap, DIY is possible
- Outside the building, manhole-style lids, in the ground: grease interceptor, professional pumping required
- You are not sure where it is at all: get a professional to locate and inspect it before your next health inspection, not after
One more caveat before the how-to. Even if your trap is DIY-sized, check your local rules first. Some health departments and sewer districts require service records from a licensed hauler, period. In that case, cleaning it yourself keeps the trap working but does not keep you compliant on paper, and paper is what the inspector asks for.
What You Need to Get Started With Grease Trap Cleaning
Do not open the lid until you have everything staged. A half-finished grease trap cleaning is worse than none, because now the trap is open, the kitchen smells like a rendering plant, and you still have nowhere to put the waste.
Gather these before you begin:
- Heavy rubber gloves that reach past your wrists. Grease trap contents can carry bacteria you do not want in a cut.
- Eye protection. Scraping hardened grease sends flecks flying.
- A pry bar or crowbar. Trap lids seal with gaskets and can stick hard. Go slow so you do not bend the lid or crack the gasket.
- A small bucket or scoop for pulling grease and solids out in layers.
- Heavy-duty trash bags, doubled, or a sealable container rated for the waste. Check what your local disposal rules allow.
- A shop vacuum, wet-rated, if you want to speed up removing the liquid layer. Plan on that vacuum being a grease-trap-only tool afterward.
- A steel scraper or putty knife for the walls, baffles, and lid underside.
- Dish soap, warm water, and rags for the final wash-down.
- A measuring stick or ruler to record the grease depth before you start. More on why that matters below.
In addition, pick your timing. Clean the trap when the kitchen is closed and the water in the trap has cooled. Hot trap contents are a burn risk and the grease is harder to remove when it is liquid and mobile.
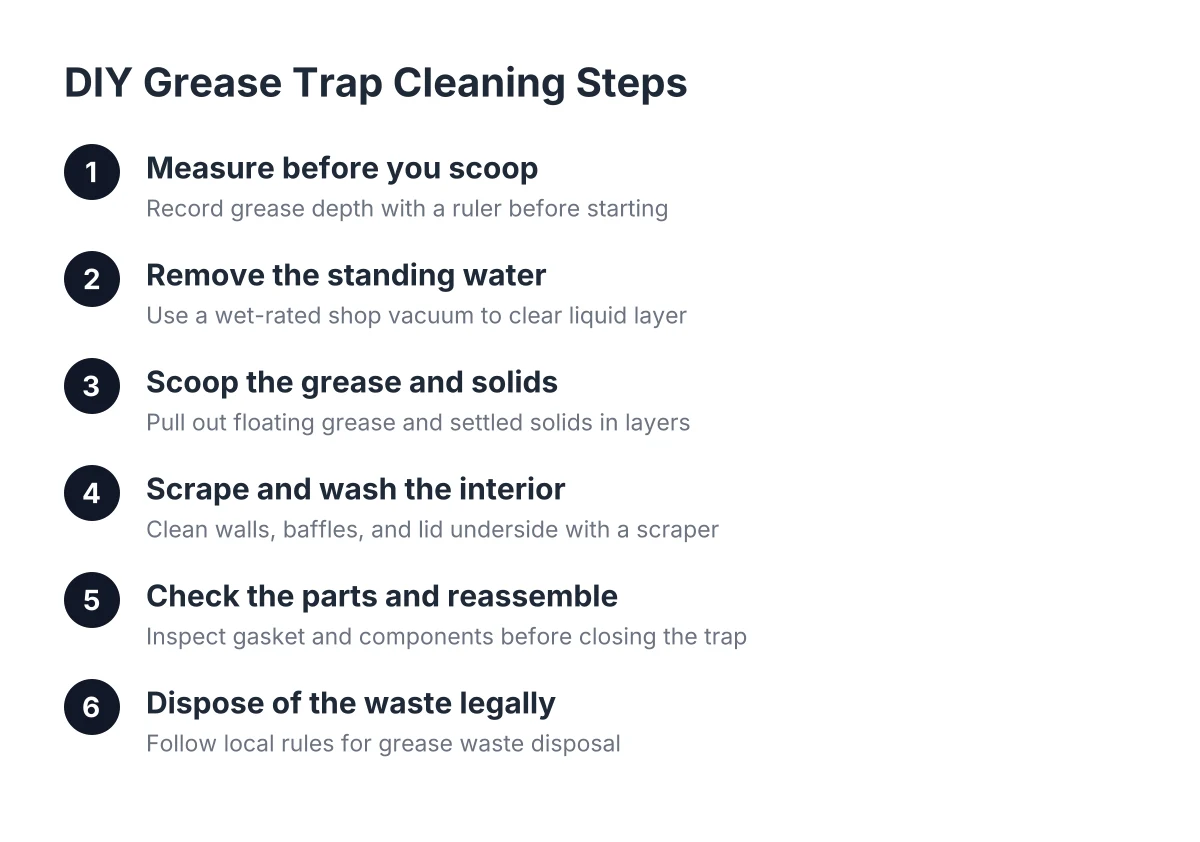
How to Clean a Grease Trap Yourself, Step by Step
Cleaning a grease trap yourself means removing all the floating grease, all the settled solids, and the buildup on the walls and baffles, then reassembling the trap with its gasket intact. Skipping any one of those steps leaves the trap partially blocked and shortens the time until it fails again. Budget 45 minutes to an hour for a small trap done right.
Step 1: Measure before you scoop
First, push a measuring stick straight down through the grease layer until you feel it hit the bottom solids, then to the floor of the trap. Note the grease depth. This number tells you how full the trap was, which tells you whether your cleaning schedule is right. If the combined grease and solids filled a quarter or more of the trap depth, you waited too long, and your next cleaning should come sooner.
Write the date and the measurement down every single time. If an inspector ever questions your maintenance, a dated log with measurements is the difference between a conversation and a citation.
Step 2: Remove the standing water
Next, bail or vacuum the layer of water sitting between the floating grease and the bottom solids. Set it aside in a bucket. You will pour it back into the trap at the end, because a trap needs water in it to function. Refilling with the original water also avoids sending a slug of loose debris down the line when you turn the sinks back on.
Step 3: Scoop the grease and solids
Now remove the floating grease mat with your scoop, working in layers, and bag it. Then dig out the solids that settled on the bottom. This is the unpleasant part, and there is no shortcut. Leaving a few inches of solids because the smell got to you is how traps end up failing three weeks after a "cleaning."
Step 4: Scrape and wash the interior
The walls, the baffles, and the underside of the lid all collect hardened grease. Scrape them down to bare surface, then wash everything with dish soap and warm water. Vacuum or bail out the wash water and bag it with the rest of the waste. Do not rinse it down a drain; that grease just re-enters the system you are trying to protect.
Step 5: Check the parts and reassemble
Before you close up, look at the baffles and the gasket. Baffles direct the flow so the trap can separate grease; a loose or corroded baffle means the trap is passing grease even when clean. A cracked gasket means odors in your kitchen. Reinstall everything, seat the lid, pour the reserved water back in, and run a sink to confirm flow.
Step 6: Dispose of the waste legally
This step trips up more DIY owners than the cleaning itself. Grease trap waste cannot go in a dumpster in many areas, cannot go down any drain anywhere, and cannot be buried out back. Commercial kitchen grease disposal rules vary by county, so call your local waste authority and ask exactly how bagged trap waste must be handled. If the answer involves a licensed hauler, factor that into whether DIY saves you anything at all.
The Compliance Problem With Doing It Yourself
Here is the part most DIY guides skip. Health inspectors do not just look at your trap; they look at your records. Many jurisdictions want to see manifests or service receipts showing when the trap was cleaned, how much waste came out, and where that waste went. A licensed grease trap pumping service generates that paper trail automatically. A Saturday morning with a bucket does not.
Suppose you own a small strip-mall unit in Hesperia leased to a taco shop, and the county inspector shows up for a routine visit. The trap is clean because your tenant scooped it last week. But when the inspector asks for disposal records, there is nothing to show. In that scenario, a clean trap can still earn you a compliance problem, because you cannot prove the grease went anywhere legal. For landlords, that risk lands on you if the lease does not clearly assign trap maintenance to the tenant, so check your lease language before assuming this is someone else's problem.
Therefore, if you decide to clean your own small trap, build your own documentation habit. Keep a dated log with grease depth measurements, photos before and after, and receipts for any disposal. It will not carry the same weight as a hauler's manifest everywhere, but it beats a blank stare when the inspector asks.
How Often Should You Clean or Pump a Grease Trap?
A grease trap needs cleaning whenever grease and solids fill about 25% of its depth, which for a busy small kitchen often means every one to three months, and sometimes monthly or more. Frequency depends entirely on how much FOG your kitchen produces, so the measurement you take in Step 1 matters more than any generic schedule.
For example, a small coffee shop with light food service might stretch to quarterly cleanings, while a fryer-heavy burger operation can fill the same trap in weeks. Many local rules use that 25% threshold as the legal trigger, so measuring regularly is not just maintenance, it is compliance.
Watch for these signs that you are overdue, whichever schedule you follow:
- Slow drains in the sinks connected to the trap
- A sour or rotten smell near the trap or floor drains
- Grease showing up in downstream cleanouts or drains
- Water backing up when the dishwasher and sink run at the same time
If you see any of these between cleanings, shorten your interval. A trap that overflows into the line will cost far more to fix than the cleanings you skipped, especially on a septic-served property where grease that escapes the trap heads straight for your septic tank and drain field.
When to Stop Doing It Yourself and Call a Service
Some situations take DIY off the table no matter how handy you are. Call a grease trap cleaning service, or a septic crew that handles traps, when any of these apply:
- You have an in-ground interceptor. These require a vacuum truck and licensed disposal, full stop.
- The trap connects to a septic system. Out here in the High Desert, many commercial buildings and rental properties run on septic. A trap failure on septic does not just clog a pipe; it pushes grease into a tank and drain field that cost real money to repair. The U.S. Environmental Protection Agency estimates septic repair or replacement typically runs $5,000 to $15,000, far more than routine service.
- An inspector has already flagged you. After a citation, you need documented professional service, not a log book you started yesterday.
- You manage the property remotely. If you own rentals in Hesperia but live an hour away, being the person who scoops the trap every six weeks is not a plan. A recurring service visit is.
- The trap is overflowing or the line is already backed up. At that point the grease is past the trap, and clearing it is a pumping and jetting job, not a scooping job.
There is also a plain time-value question. A small landlord juggling three or four properties has better uses for a Saturday than trap duty, and a missed cleaning during a busy stretch is how small problems become tenant complaints. The trade-off is real: DIY saves the service fee but puts the schedule, the mess, and the compliance risk entirely on you.
What Professional Service Adds Beyond a Clean Trap
A professional visit does three things a bucket cannot. First, the crew pumps the entire trap or interceptor, including the emulsified grease and compacted solids a hand scoop leaves behind. Second, they can look at the trap's condition, the baffles, the inlet and outlet tees, and the downstream line, and tell you about problems before they become backups. Third, they leave you documentation showing the date, the volume removed, and legal disposal, which is exactly what health inspectors and sewer districts want to see in 2026.
For property owners running on septic, there is a fourth benefit. A crew that handles grease trap pumping alongside septic tank pumping and inspection can look at the whole system on one visit, the trap, the tank, and the flow between them. On a rental property, that single visit answers the tenant complaint, documents the service for your records, and tells you whether the septic side needs attention too, without you needing to be on site.
The Bottom Line for Owners and Operators
You can clean a small, indoor grease trap yourself if you have the right tools, a strong constitution, a legal disposal plan, and a written log you actually keep. For plenty of small kitchens and rental units, that DIY routine works fine between professional visits, or even instead of them where local rules allow.
But be honest about your situation. If your trap is an in-ground interceptor, if your property runs on septic, if an inspector is already watching, or if you simply are not going to be there with a scraper every month, the DIY math does not work. The cheapest grease trap is the one that never overflows, never fails an inspection, and never sends grease into a drain field. Whether you get there with your own two hands or a scheduled service visit matters less than getting there before the backup does.
If you need your septic tank serviced, Hesperia Septic can help.